We’ve all been there: you have inches of beautiful hair, but you end up wearing the same tired ponytail every single day because anything else feels too complicated. Your lengths actually offer a massive canvas for creativity, yet so many of us leave that canvas completely blank. Finding fresh hairstyles for long hair should not require a professional stylist or a frustrating struggle in front of your bathroom mirror.
Growing out those gorgeous strands is much like tending a high-maintenance garden, meaning it needs a realistic plan to truly bloom. Without a strategy, everyday people often fall into three common DIY styling mistakes: skipping the essential foundation prep, using the wrong product for their specific hair type, and ignoring how gravity affects their final look. These simple errors are exactly why the beautiful long hair styles you admire online often collapse before your lunch break.
According to salon professionals, the true secret to preventing that midday collapse comes down to a basic concept called the weight-to-style ratio. Basically, length without proper styling support is just heavy hair that aggressively pulls your roots flat against your scalp. Balancing this ratio creates a sturdy foundation, ensuring your hair looks full and bouncy instead of dragged down and lifeless.
Are you finally ready to elevate long hair without adding hours to your hectic morning schedule? This guide breaks down the simple science of smart styling to deliver foolproof, five-minute solutions that actually last from the office to dinner. You will soon master stunning techniques that look incredibly high-effort but are wonderfully easy to achieve.
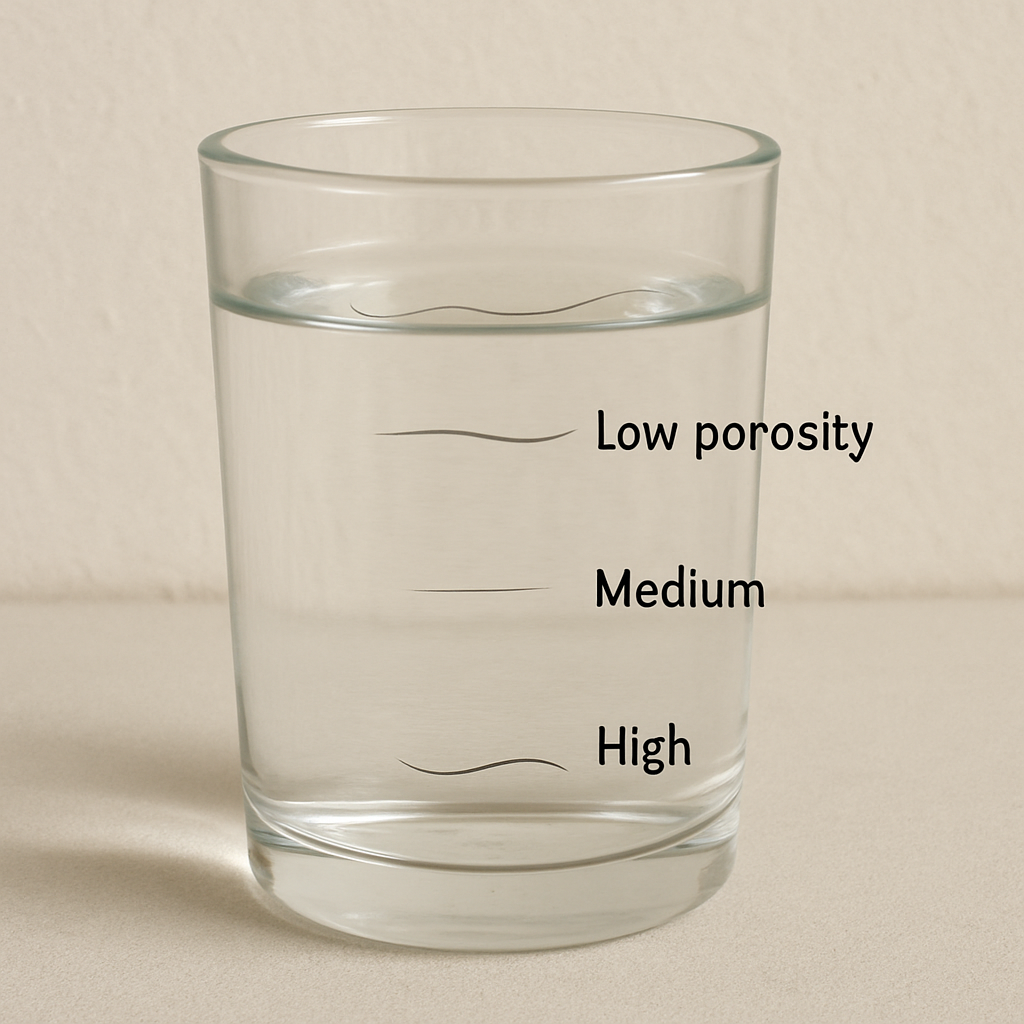
Have you ever noticed your expensive leave-in conditioner just sitting on top of your strands, making them look greasy instead of hydrated? This happens when we misunderstand the impact of hair porosity on product absorption. Think of your hair’s outer layer, the cuticle, like shingles on a roof. If those shingles are tightly closed (low porosity), moisture struggles to get in. If they are wide open (high porosity), moisture rushes in but escapes just as fast, threatening your overall long hair health.
Figuring out how your hair absorbs moisture takes less than two minutes with a quick experiment.
Fill a clear glass with room-temperature water.
Take a clean, dry strand of your hair (grab one from your brush) and drop it in.
Wait two to three minutes and observe where it settles.
Strands floating at the top mean you have low porosity hair; you need lightweight, water-based products and a little warmth (like a warm towel) to help open that tight cuticle for absorption. Conversely, if your hair sinks to the bottom, it’s high porosity and craves heavy, oil-based creams to seal those open shingles shut. Once your hair is properly hydrated and prepped, you establish the foundation for a flawless style, whether you're maintaining your current cut or adding new dimension.
Now that your hair is hydrated, skip the kitchen scissors for a quick style change. Standard household scissors crush the cuticle as they slice, instantly causing split ends. Successful DIY hair trimming requires specific tools for a safe, clean cut. Gather your essentials to learn how to cut face framing layers at home:
Sharp hair shears (never household scissors)
Sectioning clips to hold hair back
Fine-tooth comb for smoothing
Spray bottle to dampen strands
Achieving symmetrical results relies on a simple sectioning trick known as the "Unicorn Method." Brush your slightly damp hair completely forward, gathering it into a tight ponytail directly at the center of your forehead. Securing the hair here creates a foolproof, even base. Next, slide a second elastic down that ponytail to your target length—usually around chin level—combing carefully to keep the tension smooth and straight.
Instead of chopping straight across like a blunt broom, use a technique called "point cutting" for a seamless finish. Hold your shears vertically and snip upward directly into the tips of the ponytail. Snipping upward into the hair removes the harsh edge, leaving you with beautifully feathered, blended ends once the elastic is released. If these fresh layers reveal that the rest of your mane still feels overwhelmingly heavy, strategic weight removal techniques can easily balance the look.
Anyone with exceptional hair density knows that having "too much" hair can be a literal pain in the neck. When managing thick hair volume and weight, the secret is a technique called "internal layering." Think of this concept like thinning out a dense forest; a stylist removes bulk from the inner sections of your hair while leaving the top canopy completely intact. This clever weight distribution provides a much lighter feel without sacrificing your long, flowing aesthetic.
Quick styling hacks can also instantly reduce heaviness between salon visits if a haircut isn't on your agenda. The "under-braid" technique is an everyday lifesaver for hiding roughly twenty percent of your hair's bulk. Simply gather a small section at the nape of your neck, braid it tightly, and pin it flat against your scalp. Styling the rest of your hair over this hidden anchor removes excess density from a ponytail or bun while keeping the surface looking perfectly smooth.
Taming the remaining thickness requires smoothing creams or lightweight oils to prevent unwanted puffiness throughout the day. These de-bulking products seal the hair cuticle, pairing perfectly with low maintenance haircuts for wavy texture to keep heavy locks effortlessly controlled rather than overly round. Balanced density naturally translates to longer-lasting styles, especially when utilizing overnight setting techniques.
Craving bouncy curls without the daily heat damage? The secret to safe heatless waves lies in hydrogen bonds. Think of these bonds like tiny temporary bridges inside each strand. Water breaks them down, and as your hair dries, the bridges rebuild in their new resting shape. By letting your hair dry wrapped up, you set those bridges without touching a hot tool.
Achieving the perfect set relies entirely on the "Dampness Threshold." If your hair is soaking wet, the inner layers won't dry by morning, leaving your style completely flat. If it is too dry, those internal bonds won't reshape. Aim for hair that feels like a thoroughly wrung-out towel—cool but not dripping. Once you reach this ideal moisture level, you are ready to master heatless overnight curls for beginners using a soft bathrobe belt.
Grab your belt and follow this simple five-step process:
Part your damp hair evenly down the middle.
Pin the belt's center over your crown like a headband.
Wrap a small, face-framing section of hair backward around the belt.
Gather more hair into the wrap each time around until coiled.
Secure the ends with a scrunchie and repeat on the other side.
Morning unraveling reveals effortless volume. If wrapping feels tricky, weaving techniques offer an equally beautiful, heat-free alternative.
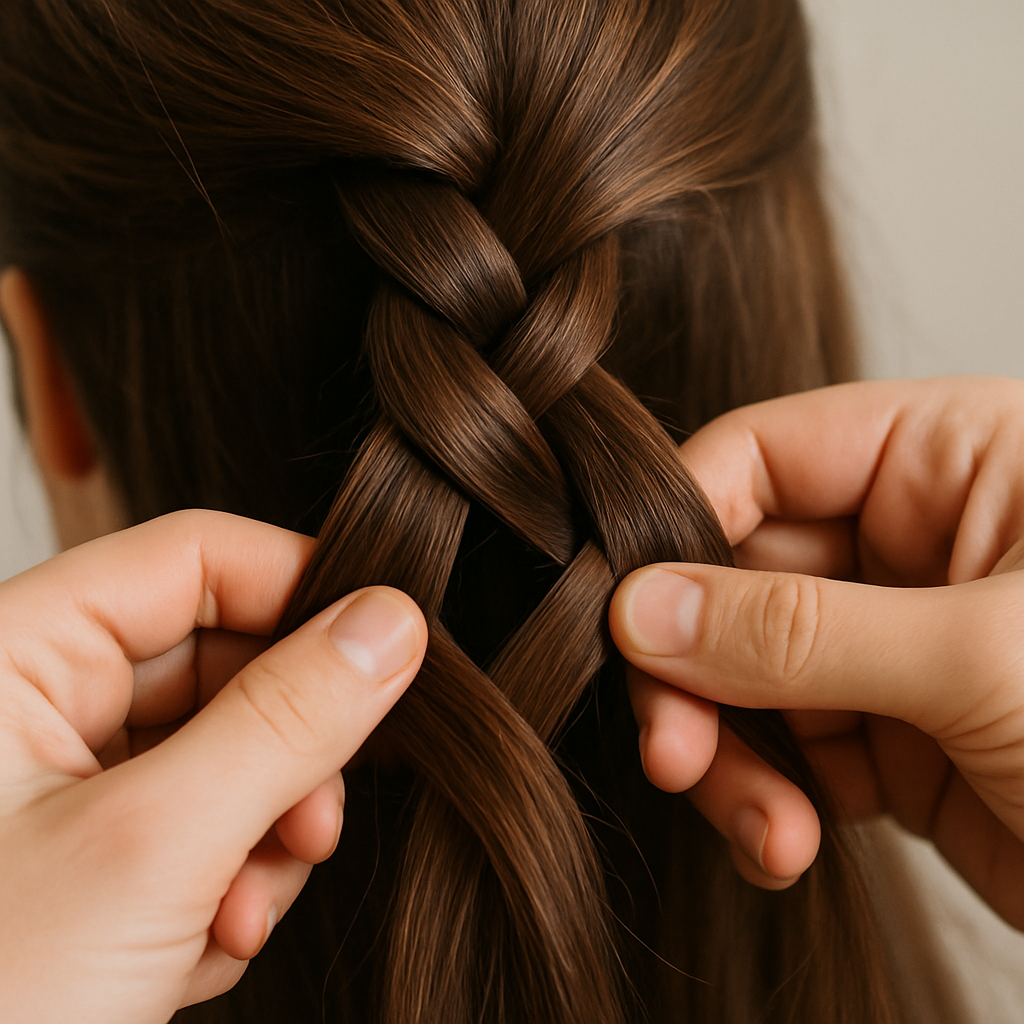
Have you ever stared at a bulky, 3D braid and wondered why yours always look flat? The secret lies in understanding french braid vs dutch braid differences. The mechanics match the basic three-strand braid you already know, just flipped:
French (Inward/Flat): Cross the side strands over the middle, creating a braid that sits flush against your head.
Dutch (Outward/3D): Use an underhand technique, tucking side strands under the middle, pushing the braid outward.
Keeping your arms lifted while styling can quickly lead to exhaustion. To avoid hand cramping, try the "pinky-anchor" grip. Rest your knuckles close to your scalp, using your pinkies to pin the outer sections of hair tightly against your head while your thumbs and index fingers weave the middle pieces.
Once secured with an elastic, you can triple the visible volume of your hair using a method called "pancaking." Starting at the bottom and working upward, gently pinch and pull the outer edges of each braid loop wide and flat. This simple fluffing trick is the true foundation for gorgeous bohemian braided updos, making it the perfect base for elegant, event-ready styles.
Even long-hair styling days benefit from the right baseline cut. If you are rethinking length or face-framing layers, HairPick previews ten structurally sound options on your selfie—accounting for gravity, density, and proportions—plus guidance for your stylist when you want a change beyond updos.
Finding the perfect balance between loose waves and a formal updo makes half-up half-down styles for weddings an absolute staple. When prepping long hair styles for special occasions, a flattering silhouette starts by determining the best crown placement for your face shape. If you have a rounder face, gathering hair higher up adds elongating volume, while those with longer faces benefit from securing hair further back toward the skull's curve.
Creating breathtaking length without extensions is surprisingly simple using the Double-Pony hack. Instead of pulling your upper hair into one heavy, drooping elastic, you create two separate ponytails stacked vertically. First, gather a small section at your ideal crown placement and secure it, then make a second ponytail directly beneath it using hair from just above your ears. The top ponytail cascades over the bottom one, blending seamlessly to fake extra length and incredible volume.
To instantly elevate this style from everyday to event-ready, camouflage those clear elastics using the invisible pin technique. Take a small piece of hair from the ponytail and wrap it tightly around the tie until a tiny tail remains. Slide a bobby pin straight down into the center of the elastic, catching that tail to anchor the heavy section completely out of sight. With this polished foundation mastered, you can easily adapt these mechanics for softer, more bohemian aesthetics.
Does your hair absolutely refuse to hold a style right after you wash it? Clean, slippery strands are actually the enemy of bohemian braided updos for special occasions. Before attempting an intricate look, you need to create "grip." Think of grip as adding a subtle, Velcro-like texture to your hair. A quick dust of texture powder or dry shampoo through your mid-lengths provides the friction needed to keep your style from unraveling.
If traditional braiding leaves your fingers tangled, the pull-through method gives you an impressive, romantic finish using only clear elastics. It easily elevates a standard messy bun for long hair into a stunning formal updo. Here is how to master it:
Tie a small half-up ponytail at your crown.
Create a second ponytail directly beneath the first.
Split the top ponytail in half, pull the bottom ponytail up through that gap, and secure the split pieces together with a new tie underneath.
Repeat this pattern down your hair, then wrap and pin the finished length against your head like a crown.
To soften the final look, gently tug at the outer edges of each loop to create massive, airy volume. Once pinned securely, this sturdy style lasts all night. Mastering these foundational techniques perfectly sets the stage for anyone to enjoy and manage longer lengths.
Navigating the office with flowing locks requires balancing a polished look with daily comfort. While traditional man bun styling pulls everything tightly to the top of the head, the Low Knot offers a relaxed, professional alternative. Gathering your hair at the nape of your neck creates a sophisticated silhouette perfect for formal meetings. This lower placement also naturally supports tension-free styling; pulling hair too tightly every single day puts intense stress on your follicles and can actually cause a receding hairline over time.
When you want to wear your hair down without it falling into your eyes, the half-up "Bro-Flow" is your best solution. To achieve this effortlessly swept-back look, simply pull the top section of your hair backward and secure it with a tie, leaving the bottom half completely loose. Working a dime-sized amount of matte clay through your strands beforehand provides natural texture without looking greasy. Think of matte clay like a dry sponge—it absorbs excess shine while providing the essential grip needed to hold your shape.
Mastering these versatile hairstyles for men with long hair means finding the perfect sweet spot between a secure hold and healthy roots. If your scalp aches by dinner, your style is simply too tight. Protecting your strands from daily damage requires upgrading your everyday accessories and styling tools.
We’ve all felt a hair tie ripping out strands at the end of a long day. Traditional elastics with metal connectors cause severe mechanical breakage—the physical snapping of your hair shaft under stress. To protect your strands, upgrading to the best hair ties for preventing breakage is crucial. Swap rigid bands for silk scrunchies or spiral ties that act like a gentle cushion.
Building a solid foundation requires upgrading to the essential tools for DIY styling. Consider this your "Breakage-Free" Toolkit:
Silk Scrunchie: For friction-free holds.
Wide-tooth Comb: To safely separate wet tangles.
Boar Bristle Brush: Your secret weapon. Unlike plastic bristles that just scratch your scalp, boar bristles act as a natural conditioning treatment. They pick up sebum—the natural oils produced at your roots—and distribute it evenly down to your dry ends.
Modifying your daily technique will also save inches of hair. Always use the "Bottom-Up" brushing method by detangling at the tips first, slowly working up to the roots. This prevents tiny snags from snowballing into massive knots. Once your daytime arsenal is set, maintaining healthy lengths requires equal attention to your nighttime routine.
You might feel like your hair refuses to grow, but the culprit is usually in your bed. While roots push out new strands, tossing on a standard cotton pillowcase causes cuticle friction—roughing up the hair's protective outer layer. Cotton acts like a sponge, stealing moisture and snagging ends until they snap. True length retention isn't just about hair growth tips; it relies on stopping nighttime damage before it starts.
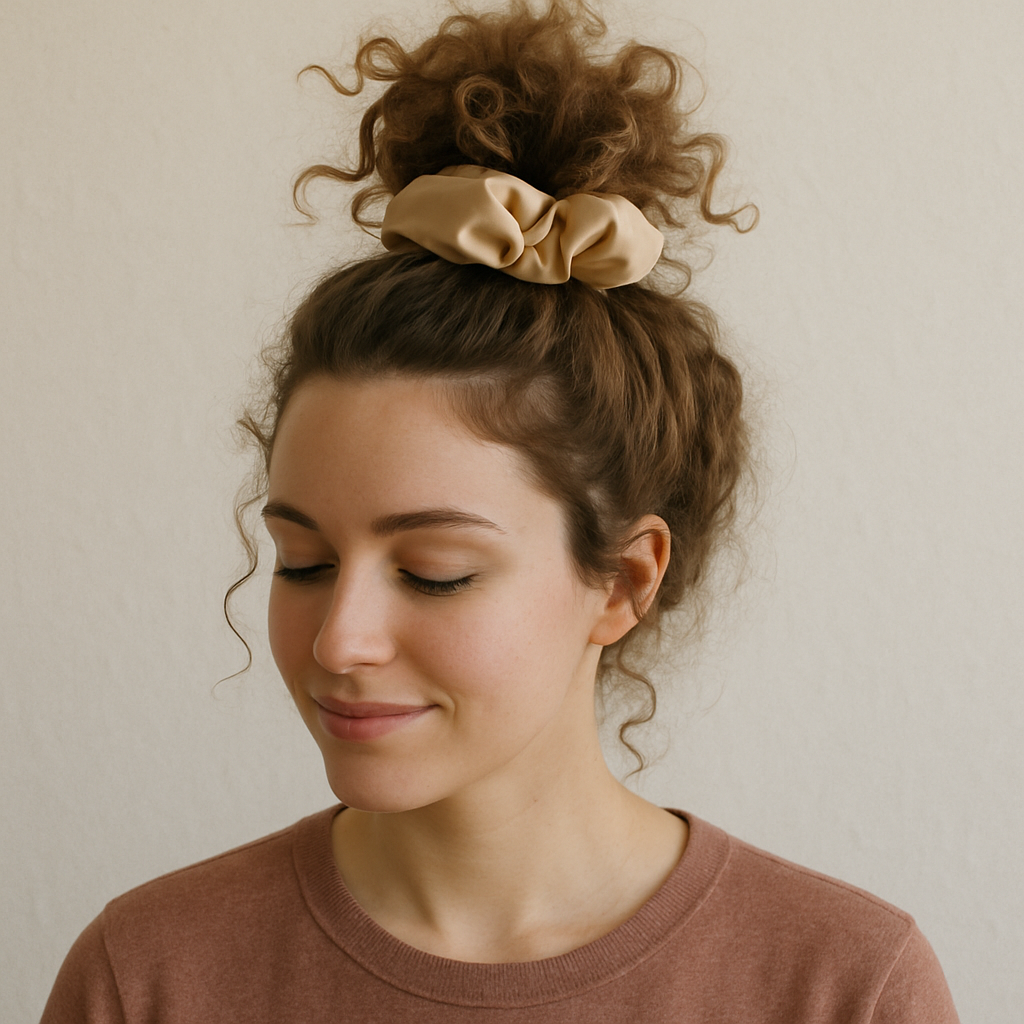
To upgrade your routine instantly, try the "Pineapple" method. Flip your head forward and gather your hair loosely at the very top of your crown, securing it with a silk scrunchie. Protective sleep styles for length retention keep fragile ends away from your pillow, preserving volume for the morning. If your hair is too heavy for a high ponytail, a silk bonnet creates a similar friction-free cocoon.
Never attempt overnight styling with damp hair. Wet strands are highly elastic and prone to snapping, while a damp scalp trapped against a pillow creates the perfect humid environment for fungal issues to thrive. Always ensure your roots are bone-dry before sleeping. Protecting your strands at night ensures fewer split ends, changing how frequently you need a trim.
Many believe the old myth that cutting your ends somehow sends a signal to your roots to grow faster. In reality, trimming prevents existing damage from ruining your hard-earned progress. Think of a split end like a run in a sheer stocking; once it starts at the bottom, it continues tearing upward. If you ignore frayed ends, they travel up the hair shaft, causing breakage so high up that your hair appears to be shrinking rather than growing.
Catching this damage early requires knowing how often to trim for maximum growth without sacrificing length. For most, a 12-week trim cycle is the ultimate sweet spot, giving roots three solid months to push out new hair before you snip the fragile tips. You are due for a visit if you spot three visual signs: your ends look transparent, your brush constantly snags at the bottom three inches, or your braids look fuzzy at the tail.
Instead of a dramatic chop, ask your stylist for a technique called "dusting." This minimal approach simply removes the tiny, damaged tips—literally dusting the ends off—so you retain new growth while stopping splits in their tracks. Mastering this balance is the core of smart hair growth maintenance and essential for a successful long-term styling routine.
You no longer have to settle for that same tired ponytail every morning. By prioritizing health first, focusing on smart prep, and mastering a few core looks, you have completely upgraded your long hair management. Gather your favorite brush, heat protectant, and elastics into a dedicated styling kit so your morning hairstyling guide takes under ten minutes.
To maximize efficiency, implement a three-day wash-to-style cycle using this Sample 7-Day Long Hair Management Calendar:
Days 1 & 4 (Wash): Cleanse, hydrate, and prep your foundation.
Days 2 & 5 (Style): Wear your hair down with simple heat-styling.
Days 3 & 6 (Updo): Transition into a chic braid or bun as natural oils build up.
Day 7 (Rest): Apply a hydrating mask to recover.
Your long hair routine is no longer a daily chore; it is an opportunity. Adopt a two-minute nightly protective routine—like securing a loose twist with a silk scrunchie—to wake up with perfectly preserved texture. Consistency with these simple steps transforms long hair from a daily struggle into your best asset.